This guide helps frontline workers use Plutomen Connect on RealWear for hands-free remote support, collaboration, and knowledge sharing. Follow the steps below to set up your device, launch the app, and perform core actions.
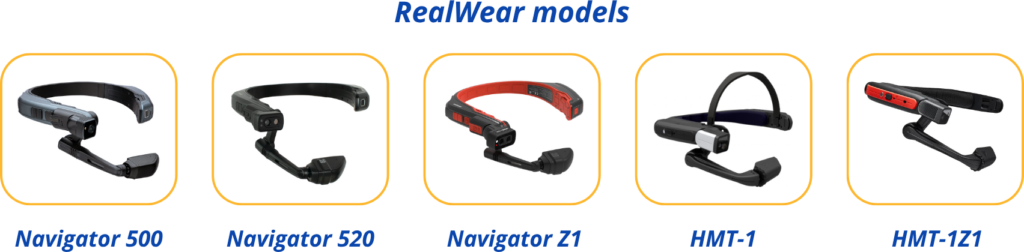
Supported Devices
RealWear Device – APK Download, Transfer & Installation #

Prerequisites
Before starting, ensure the following:
- RealWear device is powered ON
- Device battery level is above 50%
- Laptop is available
- USB cable to connect RealWear device to laptop
- APK file shared by the Plutomen Team
- Vysor (Vysor Downloads )installed on the laptop (for screen mirroring)
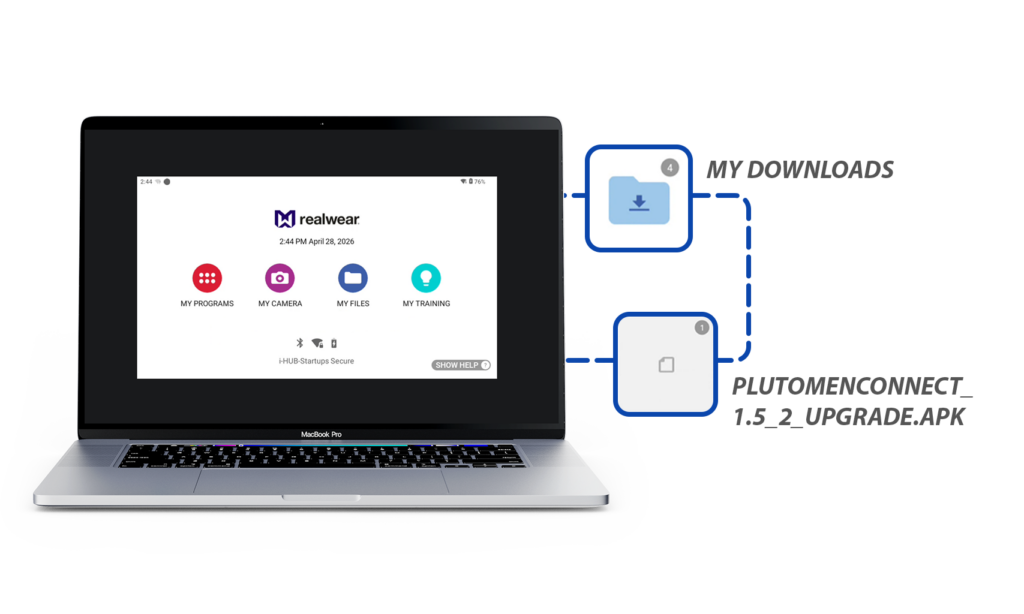
Step 1: Download APK on Laptop #
- The Plutomen Team will share the APK file via email
- Open the link on your laptop.
- Download the APK file and save it to a known location (for example: Downloads folder).
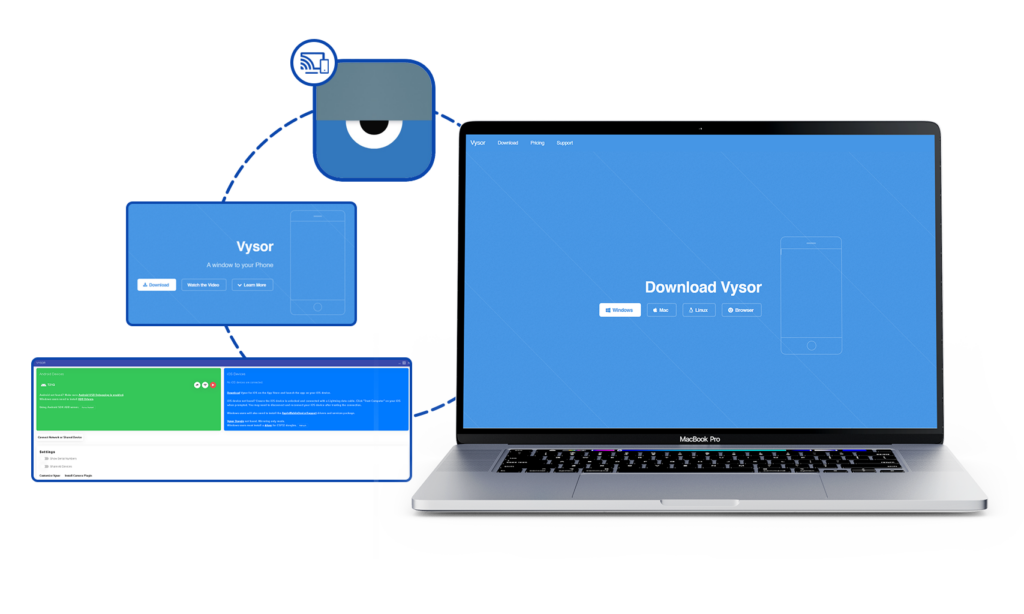
Step 2: Install and Use Vysor for Mirroring #
Vysor will be used to mirror the RealWear screen to the laptop during installation and configuration.
- Download Vysor based on your operating system: and install Vysor (Vysor Downloads) on your laptop (if not already installed).
Available Download Options:
- Windows
Select Download for Windows (.exe)
After downloading, double-click the .exe file and follow the installation steps.
- Mac (macOS)
Select Download for Mac (.dmg)
Open the downloaded .dmg file and drag Vysor into the Applications folder.
- Linux
Select Download for Linux (.AppImage or package)
Choose the file suitable for your Linux distribution and run it according to your system instructions.
- Browser Version
You can also use Vysor in a web browser without installing software.
Select Browser Version and follow the on-screen instructions.
- Connect the RealWear device to the laptop using a USB cable.
- Enable USB Debugging on the RealWear device (if required).
- Open Vysor on the laptop.
- Select the connected RealWear device.
- Start mirroring to view and control the RealWear screen from the laptop.
Step 3: Copy APK to RealWear Device #
- Connect the RealWear device to the laptop using a USB cable.
- The RealWear device will appear as a storage device on the laptop.
- Open the device storage.
- Navigate to the Downloads folder on the RealWear device.
- Copy the downloaded APK file from the laptop.
- Paste the APK file into the Downloads folder of the RealWear device.
Step 4: Install the APK on RealWear #
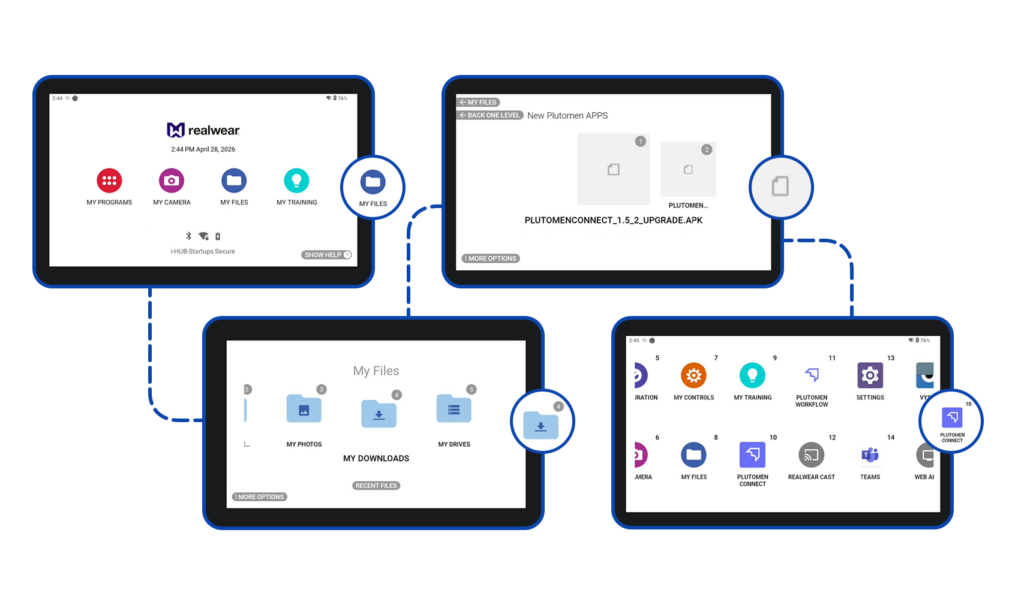
- On the RealWear device, open File Manager.
- Navigate to the Downloads folder.
- Locate the copied APK file.
- Select the APK file.
- Tap Install.
- Allow installation from unknown sources if prompted.
- Wait until the installation is completed successfully.
Step 5: Launch and Configure Application #
Open the installed application from the RealWear home screen.
Troubleshooting Tips
- Ensure USB cable is properly connected if device is not detected.
- Restart the RealWear device if installation fails.
- Make sure the APK file is completely copied before installation.
- Ensure Vysor detects the device before starting the session.
Network & Pairing #
Step 1: Open My Programs
Command: “My Programs”
Step 2: Open Settings
Command: “Settings”
Step 3: Choose the required option
- Wi‑Fi → Connect to available networks
- Bluetooth → Pair with phone or accessories
- Hotspot / Tethering → Enable network sharing (if allowed)
Add Network (QR Scan) → Allows users to quickly connect to a Wi-Fi network by scanning a QR code, eliminating the need to manually enter credentials (similar to mobile phone functionality)
Step 4: Complete Pairing
Follow on‑screen instructions and confirm using voice commands such as:
- “Select Item”
- “Scroll Down”
- “Go Back”
Login to Plutomen Connect #
Once your RealWear device is connected to the internet and the app is successfully installed, then login to Plutomen Connect (as shown in the image).
You now have three login options:
Option 1: Log in with Email & Password #
- Select the Email Address field and speak or type your registered email.
- Select the Password field and enter your password.
- Say “SIGN IN” or tap on the SIGN IN button.
- You will be logged in to the home dashboard if the credentials are correct.
If you forgot your password, select “Forgot Password?” to reset it.
Option 2: Login Using QR Code #
To avoid the hassle of dictating every detail on the RealWear device, users can log in instantly using a QR code.
Follow the steps below to generate and use the QR code for login:
- Install the RealWear Companion App from the Play Store (Android) or App Store (iOS) on your smartphone.
- Open the app and go to Remote Keyboard.
- Type your login details in the exact format shown below:
Username=your_email_here====Password=your_password_here
- The app will automatically convert this text into a QR code.
- On your RealWear device, open the Plutomen Connect application and select “Login with QR Code.”
- Scan the QR code displayed on your phone to log in instantly.
Note : Format for QR Code
Use this format exactly:
Username=your_email====Password=your_password
Option 3: Login with Guest #
Guest Login allows a user to join Plutomen Connect without creating an account. This option is useful for quick access or for external visitors who do not have registered credentials.
Follow the steps below to log in as a Guest:
Step-by-Step Process
- Select “GUEST”
On the login screen of Plutomen Connect, choose the GUEST option.
- Enter Your Name
A text field will appear. Speak or type your full name.
- Enter Your Email Address
Provide a valid email address where you want to receive call links and session details.
- Select Country
Choose your country (example shown in screenshot: 🇮🇳 India).
- Enter Mobile Number
Provide your mobile number for verification and communication.
- Click “LOGIN”
Once all information is entered, select the LOGIN button to proceed.
Home Screen
After a successful login, the user is directed to the Home Screen. This is the main control hub from where all major actions can be initiated.
Profile – View user information and verify login details.
Settings – Access device and application settings required for smooth operation.
Join – Enter a session code to immediately join an active support session.
Schedule – Check all upcoming or assigned sessions and join them directly when the time arrives.
Self Mode – Start a self-assist call to capture issues or perform guided tasks independently.
Contacts – Open the contact list to quickly select and call an expert or team member.


