Overview #
Checklists help you create structured, step-by-step workflows for tasks such as inspections, audits, and maintenance. They ensure that users follow a consistent process and capture standardized data.
A checklist is built using pages, sections, questions, and input types, and can be assigned access to users for execution.
How to Create a Checklist #
Step 1: Open Checklist Module #
Go to Checklist
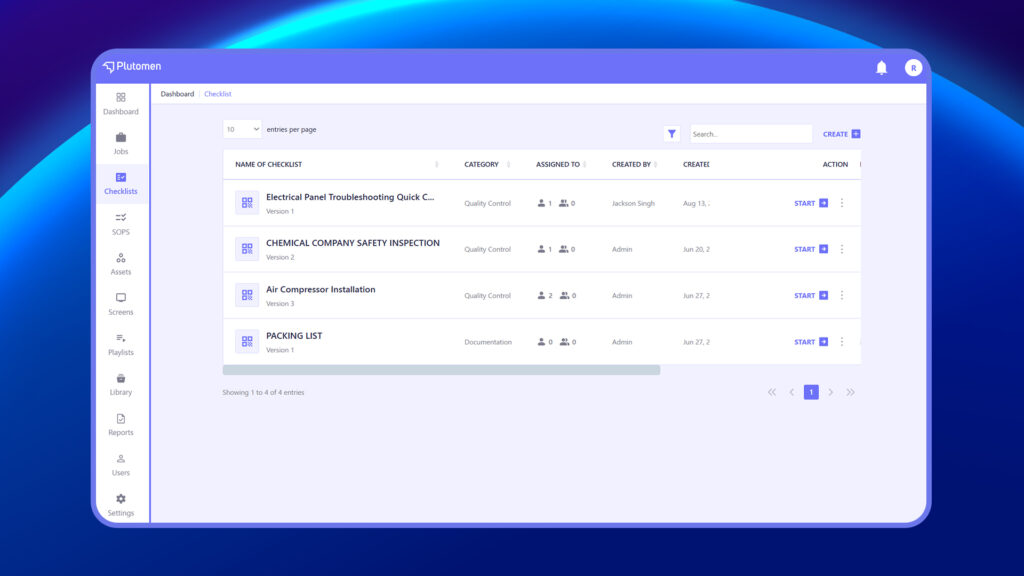
Step 2: Create Checklist #
Click Create Checklist.
Step 3: Enter Checklist Details #
Input the checklist’s title, choose its category and subcategory, and include a checklist description. This description aids your team in comprehending the checklist’s purpose.
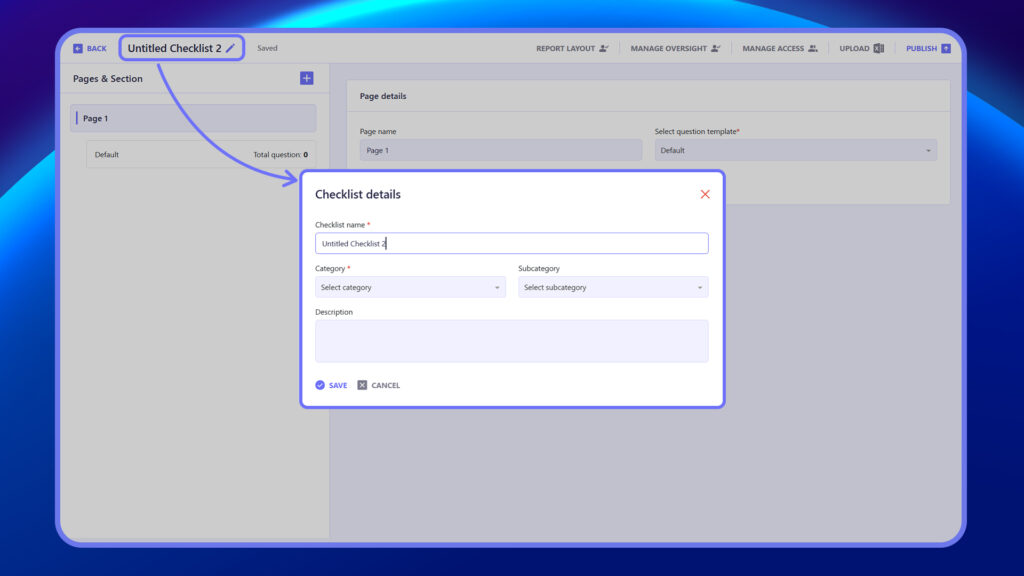
Step 4: Save Checklist #
Click Save.
👉 This creates the base checklist where you can start adding pages and questions.
How to Add Pages and Sections to Structure Your Checklist #
Step 1: Open Checklist #
Open the created checklist.
Step 2: Add Page #
Click on the + icon under Pages & Section.
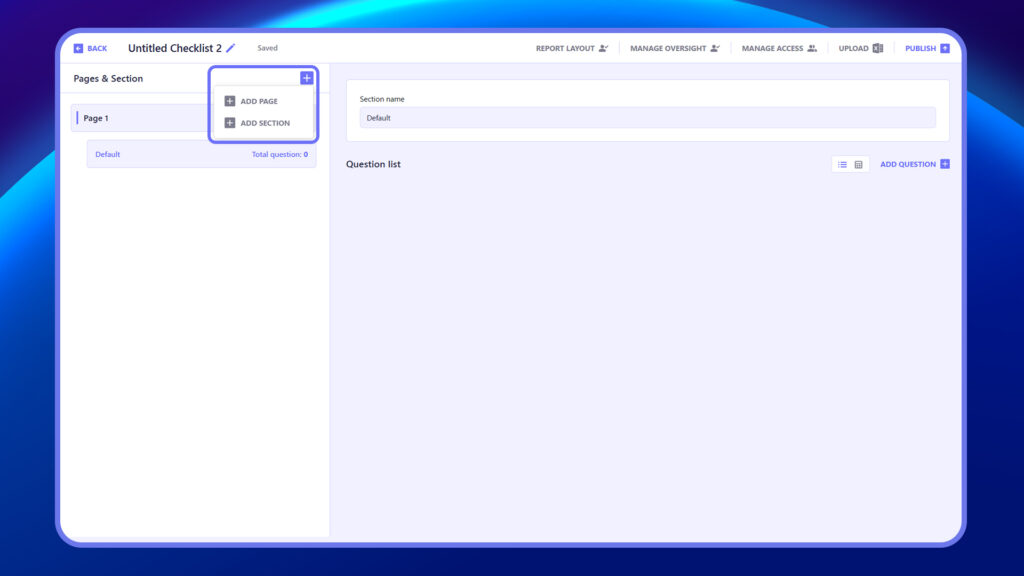
Step 3: Rename Page #
Update the Page Name (e.g., Safety Check, Equipment Check).
Step 4: Save Changes #
Changes are auto-saved, or click save if required.
👉 Pages help organize the checklist into logical sections.
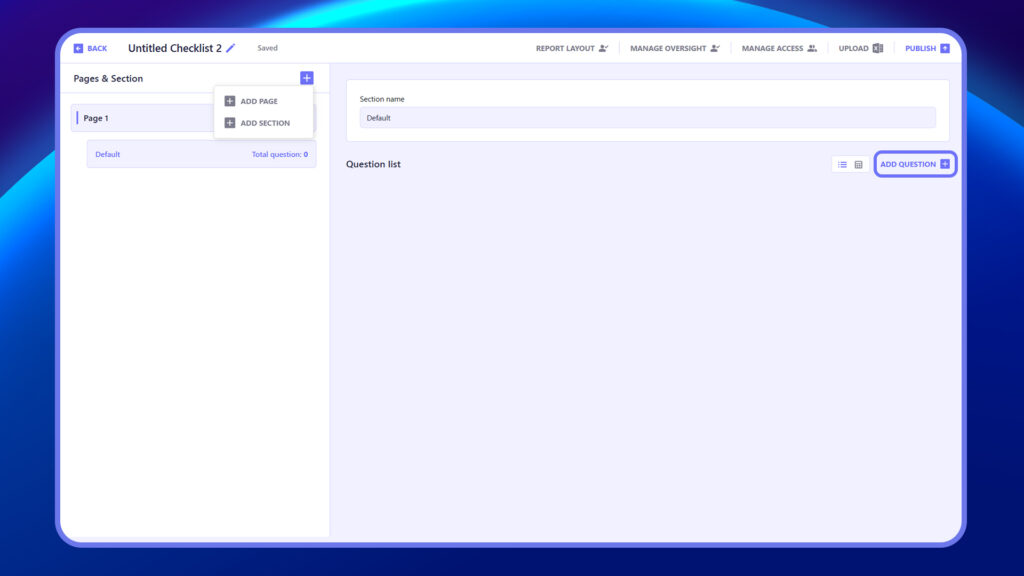
How to Add Questions in Checklist #
- Log in to the web app
- Access ‘Checklist’ from the left-hand menu.
- Select the page where you want to add a question.
- Click + Add question within a section.
5. Start typing the question/s within the question Title

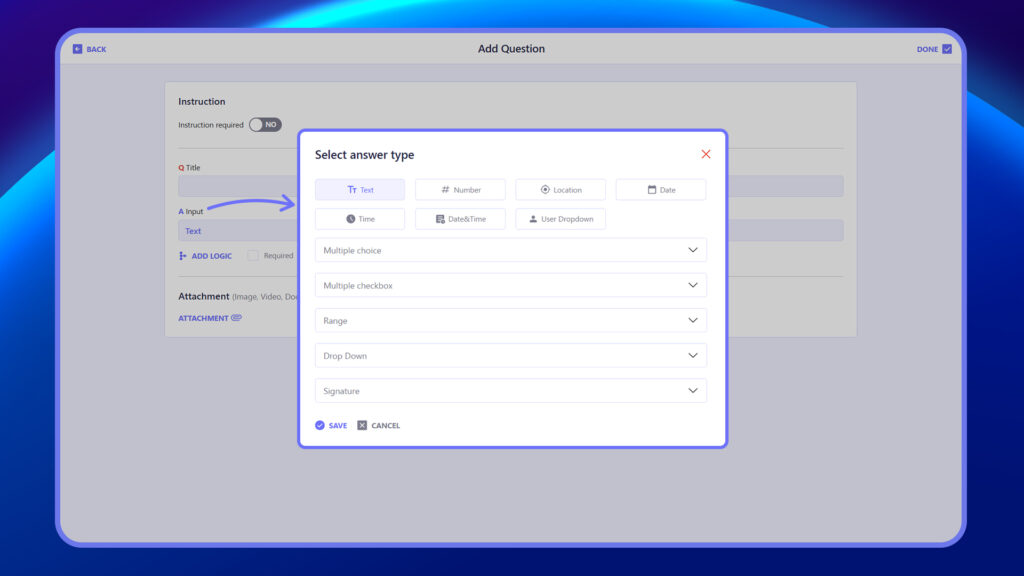
6. Select a suitable answer type for the question from the Answer tab.
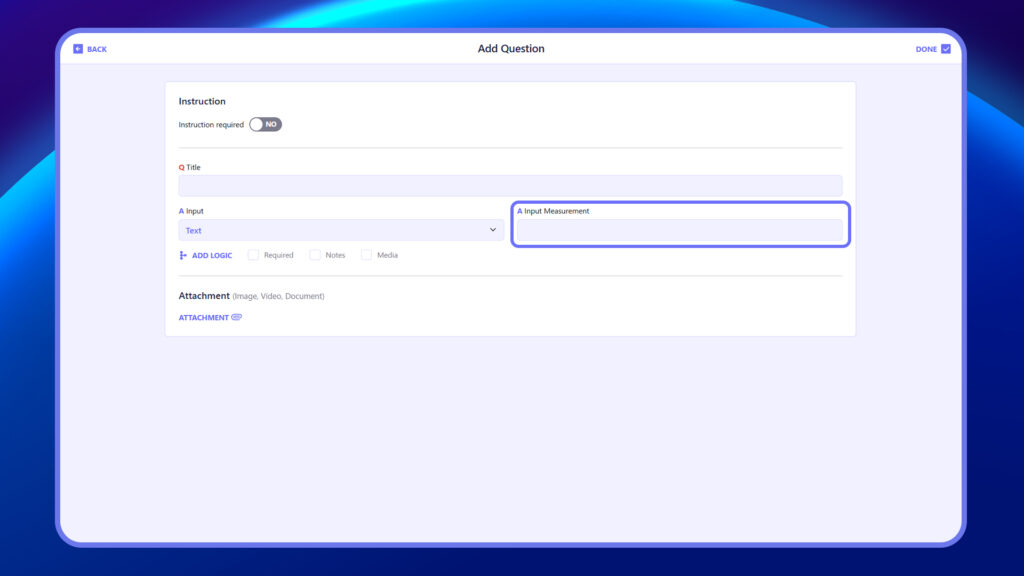
7. Key in the Answer measure, i.e., suffix if applicable. This will guide the team during inspection to know the denomination in which the value should be, eg, cms, mts, etc. This will automatically reflect in the report also.
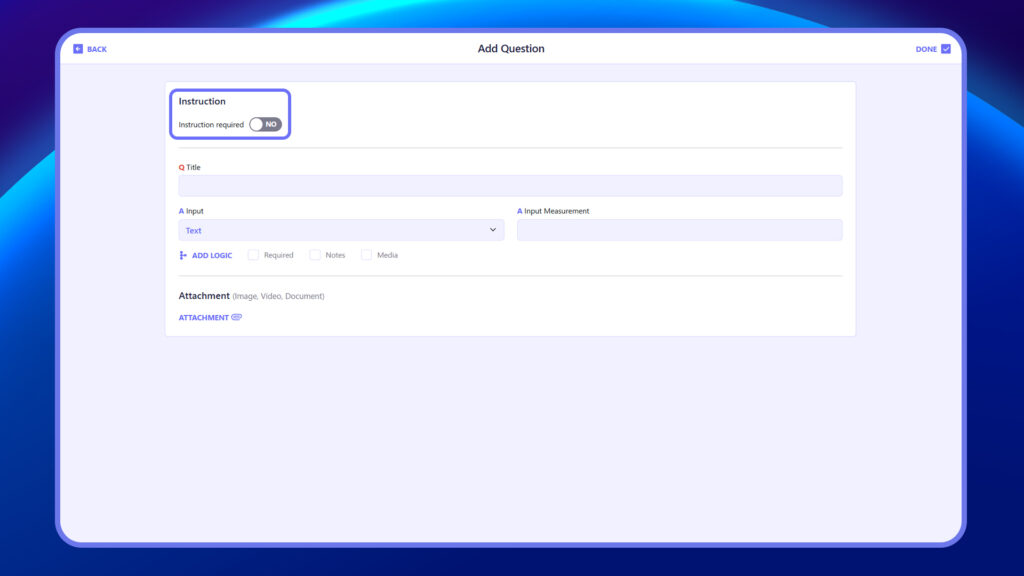
8. Add instructions or notes to a question using the instruction toggle feature. This will be displayed as additional information for the respective question during the inspection.
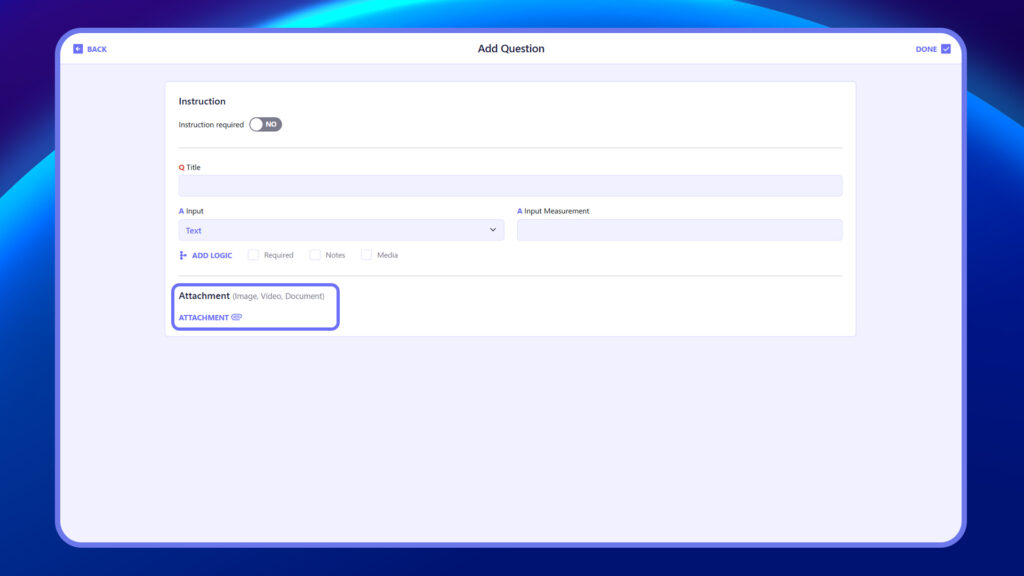
9. Add media, instructions, and documents to the question using the Attachment option next to the question field. This will display as additional information at the time of conducting the inspection.
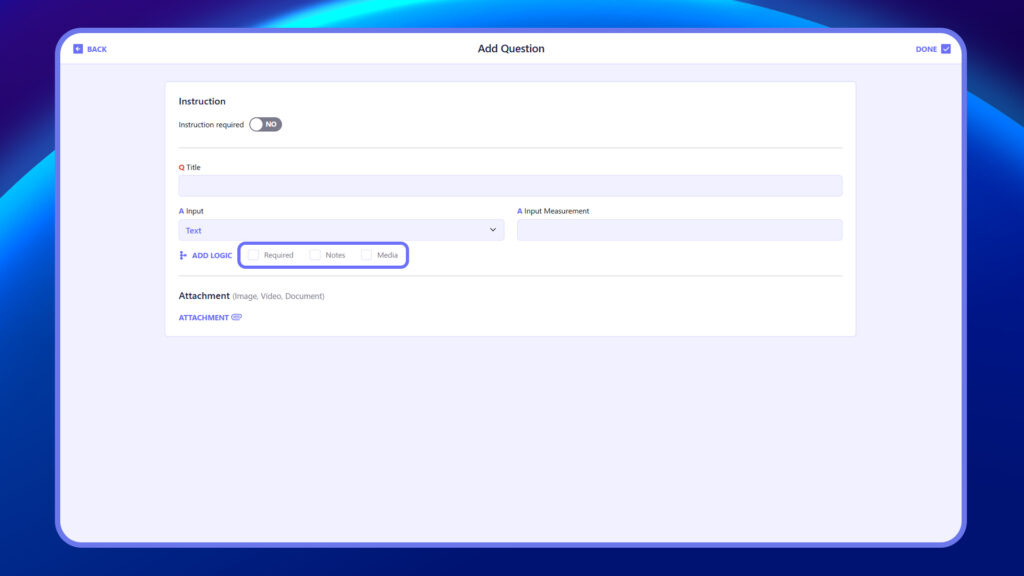
10. At the bottom left of every question, there are checkboxes:
Required – Selecting this makes the question mandatory.
Notes – Selecting this makes adding notes at the time of inspection mandatory for the respective question.
Media – Selecting this makes adding media (Image / Video) mandatory at the time of inspection for the respective question.
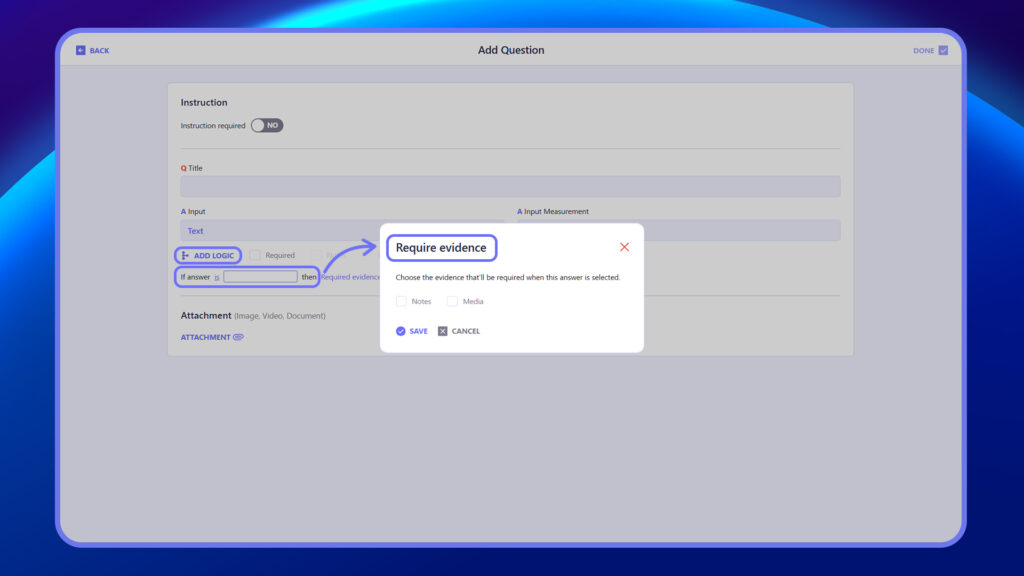
11. Add Logic: Add logic allows you to incorporate conditional logic to make notes or media mandatory based on the value entered or captured while filling out the checklist. This is especially useful in situations where media or notes are not always required for a question, but become necessary based on the value observed at the time of inspection.
Add logic is available for the following question types:
Text: Logic of mandatory notes/media or both can be applied if the text entered is equal to or not equal to a specific value.
Multiple Choice: Logic of mandatory notes/media or both can be triggered if a particular choice is selected or not selected.
Number: Logic of mandatory notes/media or both can be based on whether the number is equal to, greater than, or less than a specific value
Range: Logic of mandatory notes/media or both can determine if a value falls within a specified range or is beyond it.
Dropdown: Logic of mandatory notes/media or both can be applied if the selected value is equal to a particular list value or if a specific value is not selected.
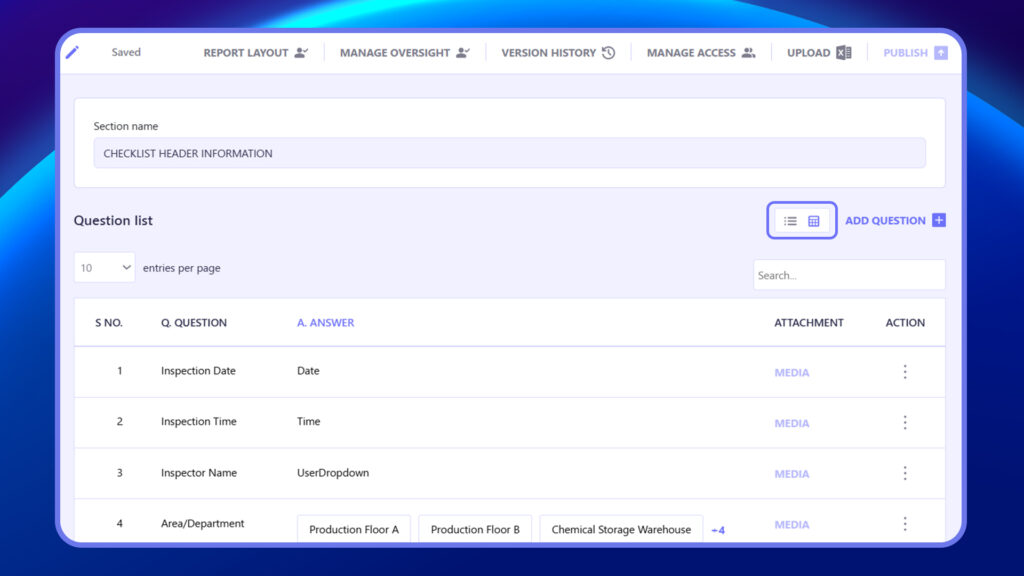
12. After adding all the questions, you can review them from a list or grid view within the page to ensure accuracy and completeness
Note #
- To select the most appropriate questions to add, look at the Checklist Answer Types available.
- “Media” and “Notes” can be added to any question at the time of inspection by a user. If marked required, it becomes mandatory for the user to key in detail to complete the inspection.
- In case Logic is added to any response type. Media or Notes will become mandatory based on input/ answer at the time of inspection.
- Instructions added to a question will be visible at the time of inspection to the user.
- You can bulk add questions and response types via Excel.
How to Create Multiple Choice Response #
- Log in to the web app.
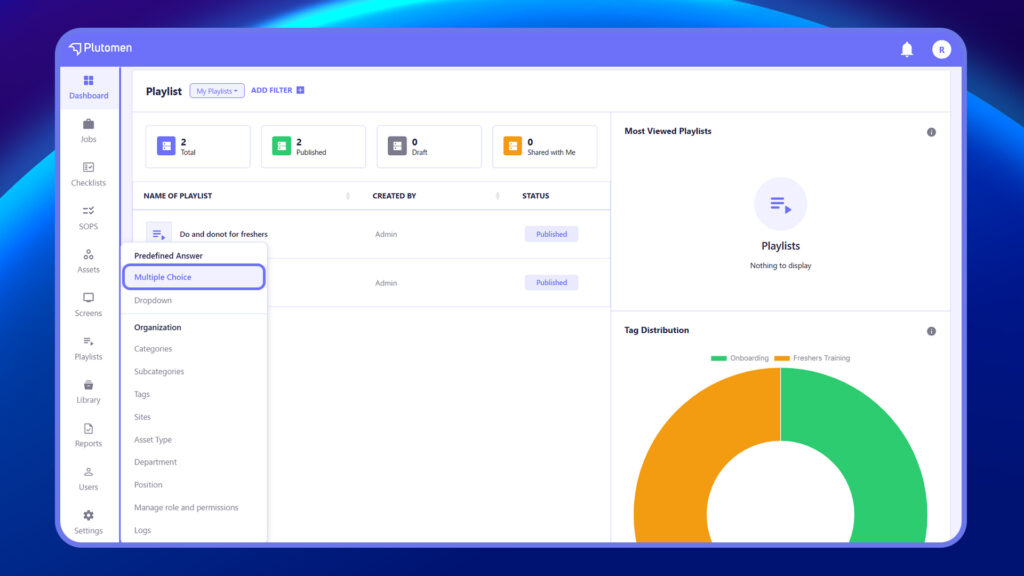
- Go to ‘Settings’ from the left-hand menu.
- Within the Settings, select ‘Multiple Choice.’
4. Click on ‘+ Create‘ at the top right.

5. Start typing in the ‘Enter choice’ field.
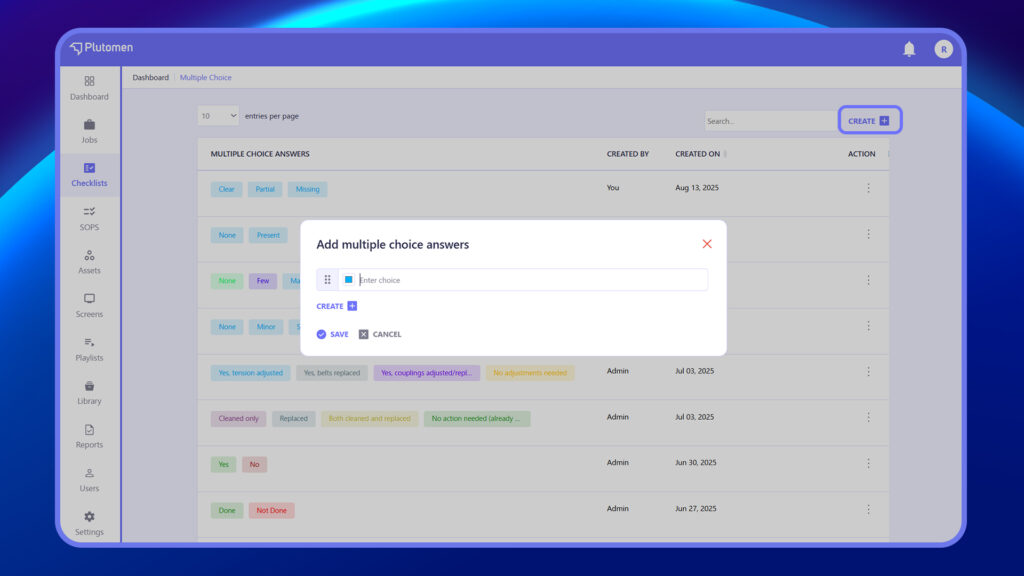
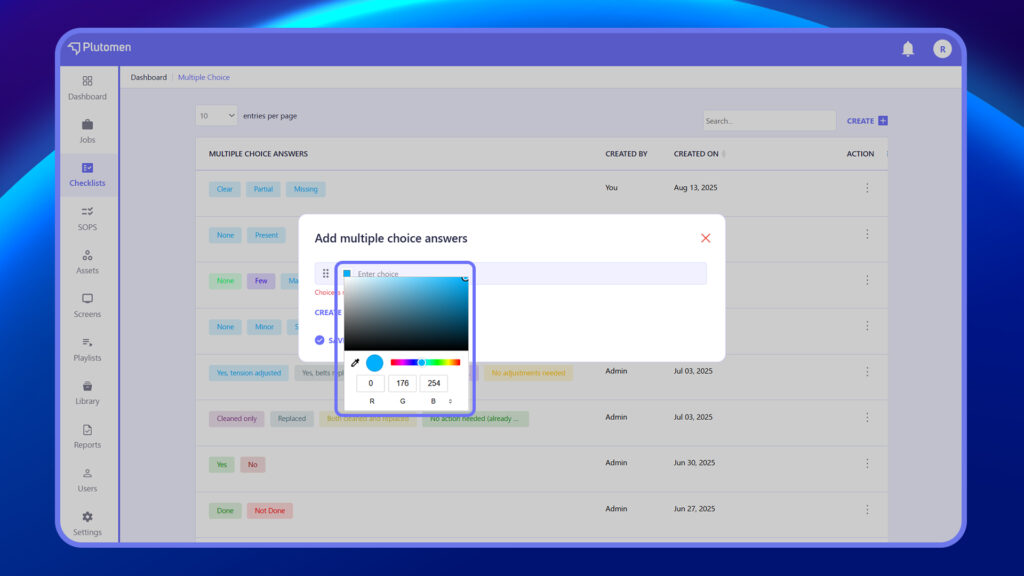
6. You can set colors for multiple-choice responses while adding an option. This will reflect the same color on reports.
7. Click ‘+ Create’ at the bottom left to include further choices.
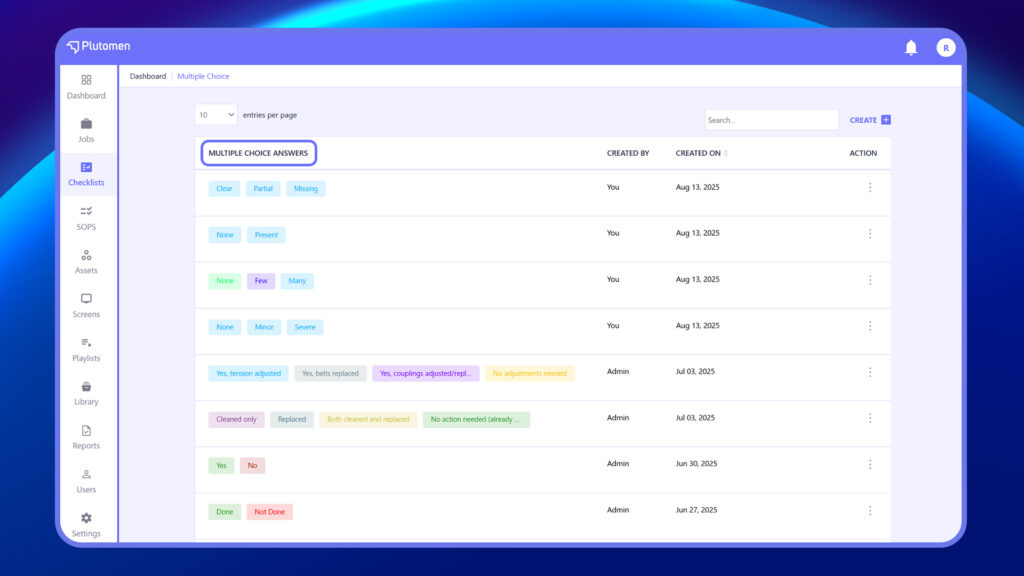
8. Once all choices are added, click ‘Save.’
9. The added multiple choices will be saved on the Multiple-Choice listing page and can be used for any checklist.
How to Create Drop Down Response #
- Log in to the web app.
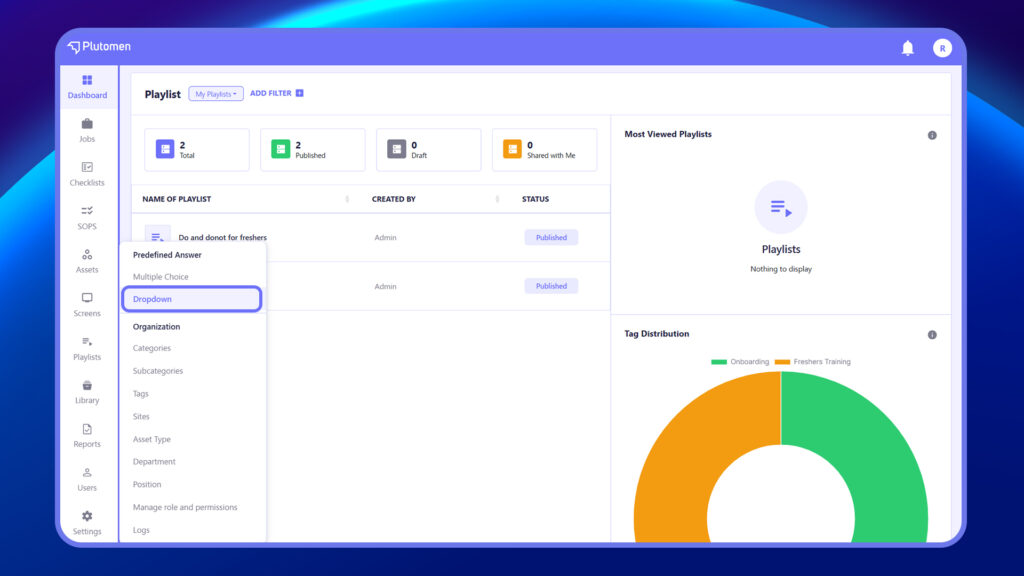
- Access ‘Settings’ from the left-hand menu.
- Within the settings, select ‘Dropdown.‘
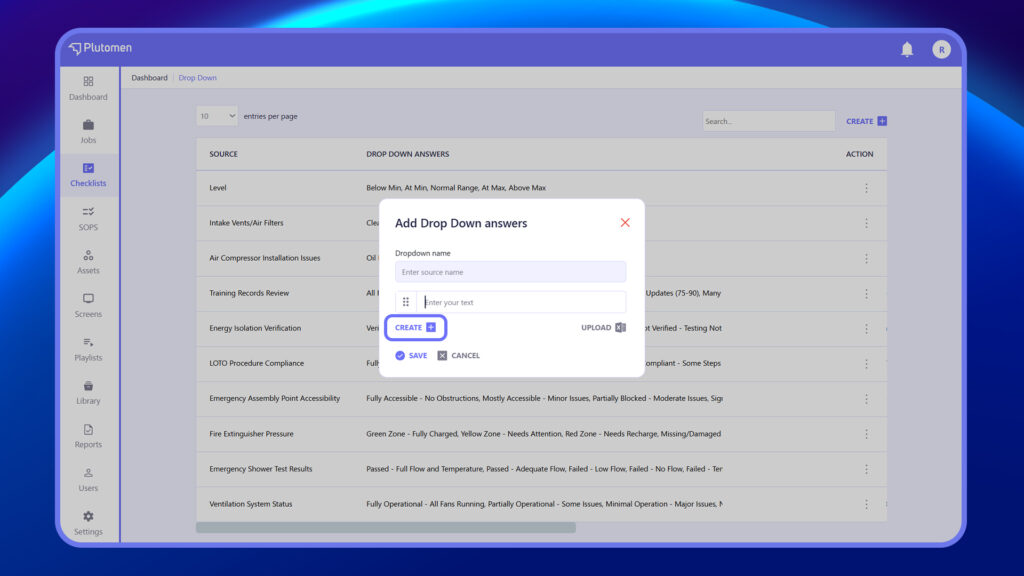
4. Click on ‘+ Create‘ at the top right.
5. Enter Source Name. Source Name is the Dropdown list name that will reflect when creating the checklist.
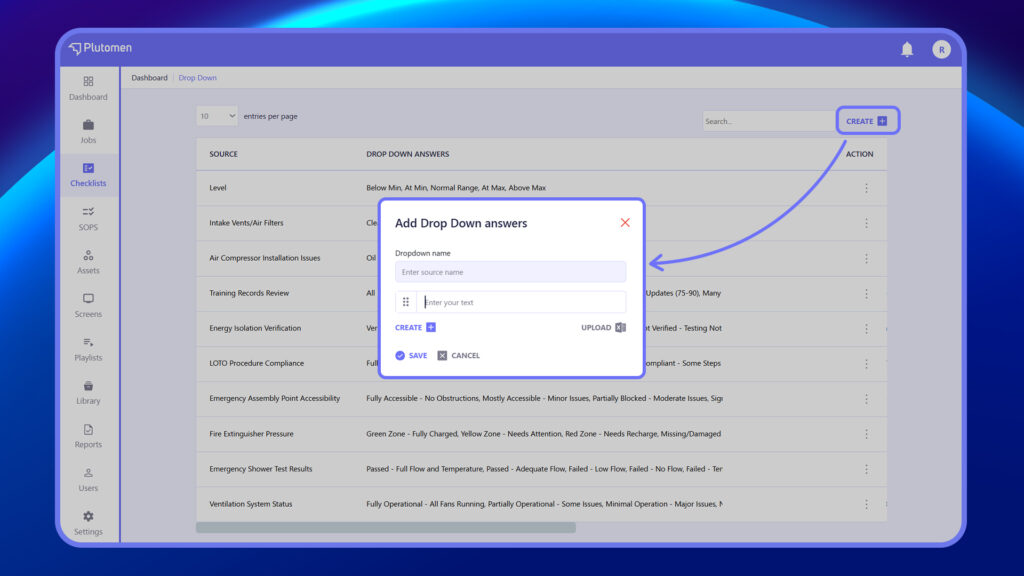
6. Start typing Drop-Down options in the ‘Enter choice’ field.
7. Click ‘+ Create’ at the bottom left to include further choices.
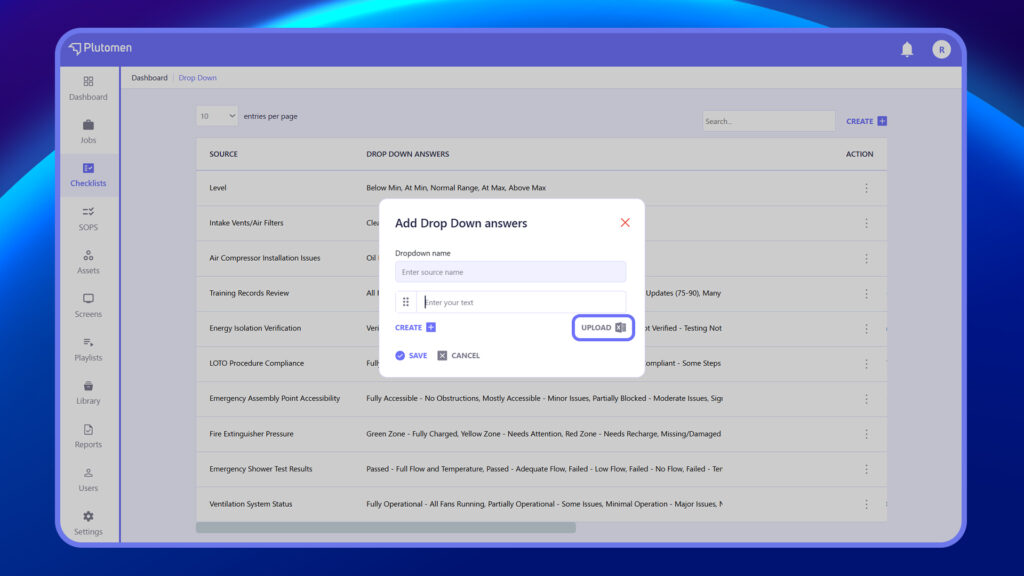
8. You can also upload Drop-Down options via Excel while adding long drop-down lists.
9. Once all choices are added, click ‘Save.’
10. The added Drop-Down choices will be saved on the Drop-Down option listing page and can be used for any checklist.
How to Configure Report Layout and Checklist Output Format #
Step 1: Open Checklist #
Go to the checklist editor.
Step 2: Click Report Layout #
Click on Report Layout (top menu).
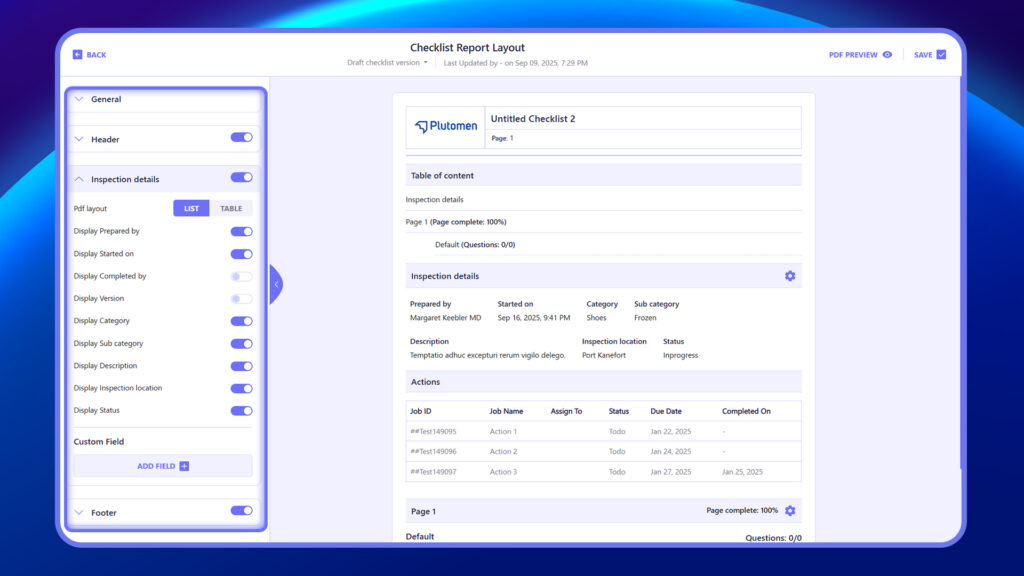
Step 3: Configure Layout #
Set how checklist results will appear in reports.
Step 4: Save Changes #
Click Save.
👉 This controls how data is displayed after checklist completion.
How to Manage Access and Assign Checklists to Users or Groups #
Step 1: Open Checklist
Go to the checklist editor.
Step 2: Click Manage Access
Click Manage Access (👥 icon).
Step 3: Select Users or Groups
Choose:
Users
User Groups
Step 4: Save Access
Click Save.
👉 Only assigned users can access and use the checklist.
How to Upload Data or Import Checklist Using Upload Option #
Step 1: Open Checklist
Go to the checklist editor.
Step 2: Click Upload
Click on Upload (Excel icon).
Step 3: Upload File
Upload checklist data if applicable.
Step 4: Save
Confirm upload.
👉 Useful for bulk checklist creation.
How to Publish Checklist for Execution #
Step 1: Complete Checklist Setup
Ensure all pages, questions, and inputs are configured.
Step 2: Click Publish
Click Publish (top right).
Step 3: Confirm
Confirm publishing.
👉 Only published checklists are available for use.


