Overview #
Before creating users, you need to define user roles, departments, and positions. These help organize users and control their access within the platform.
This setup ensures that every user has the right permissions and is aligned with the organizational structure.
How to Create a Department #
Departments help organize users based on their functional areas.
Step 1: Access Department Settings
Go to Settings → Department.
Step 2: Create Department
Click on “+ Create ” at the top right.
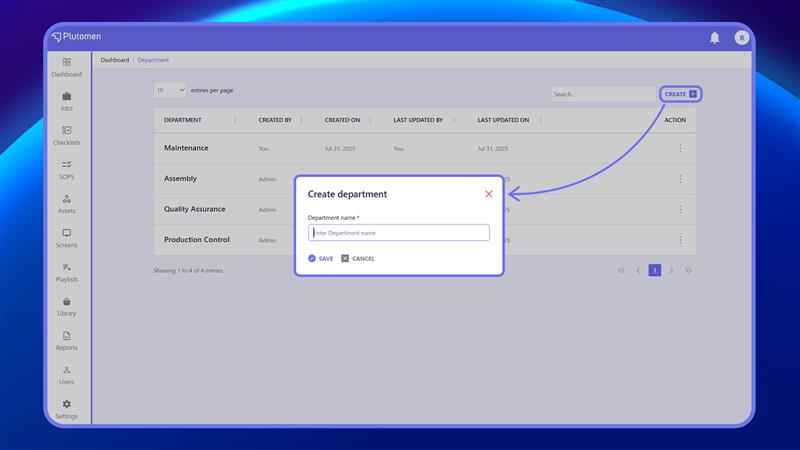
Step 3: Enter Details
Enter the name of the department
Step 4: Save Department
Click Save.
👉 Departments help in assigning responsibilities and managing workflows.
How to Create a Position #
Positions define job roles within departments.
Step 1: Access Position Settings
Go to Settings → Position.
Step 2: Create Position
Click on “+ Create ” at the top right.
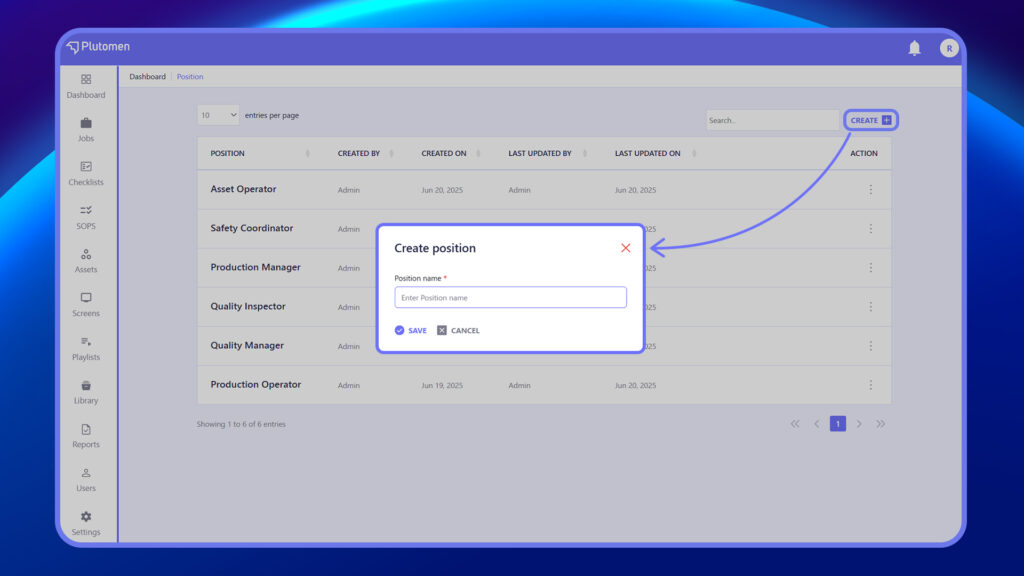
Step 3: Enter Details
Enter the position name.
Step 4: Save Position
Click Save
👉 Positions help define hierarchy and user responsibilities.
How to Create & Manage User Roles & Permissions #
User roles control what actions a user can perform in the platform.
Step 1: Access Role Settings #
Go to Settings → Manage Role and Permissions.
Step 2: Create Role #
Click Create.

Step 3: Enter Details #
Provide:
- Role Name
- Description
Step 4: Assign Permissions #
Select permissions such as:
- View
- Create
- Edit
- Delete
👉 Permissions define what users can access and perform.
Step 5: Save Role #
Click Save.
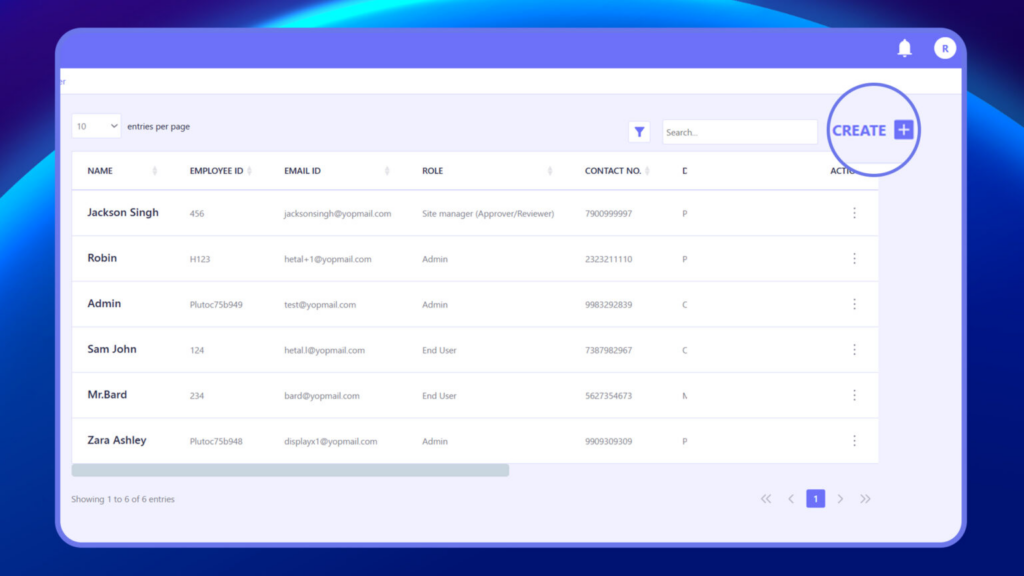
How to Create a New User #
Once all configurations are ready, you can create users.
Step 1: Open Users Module #
Go to Users from the main sidebar.
Step 2: Create User #
Click the “Create +” button at the top-right corner.
Step 3: Enter User Details #
Provide:
- Name of User: Full name or email ID
- Email: Must be a valid work email
- Employee ID: Unique user code or employee number
- Contact No.: Phone number with country code
- Department: Select from the dropdown
- Position: Select designation
- User Role: Choose either Admin or User
- Password: You can generate or manually enter it
- User Status: Set to Active or Inactive
- Data Permission: Choose one of the following:
- All Data Access – Full access to all available data.
- User & Site-Specific Data Access – Access limited to data for specific users and designated sites.
- User-Specific Data Access – Access limited strictly to data for individual users only.
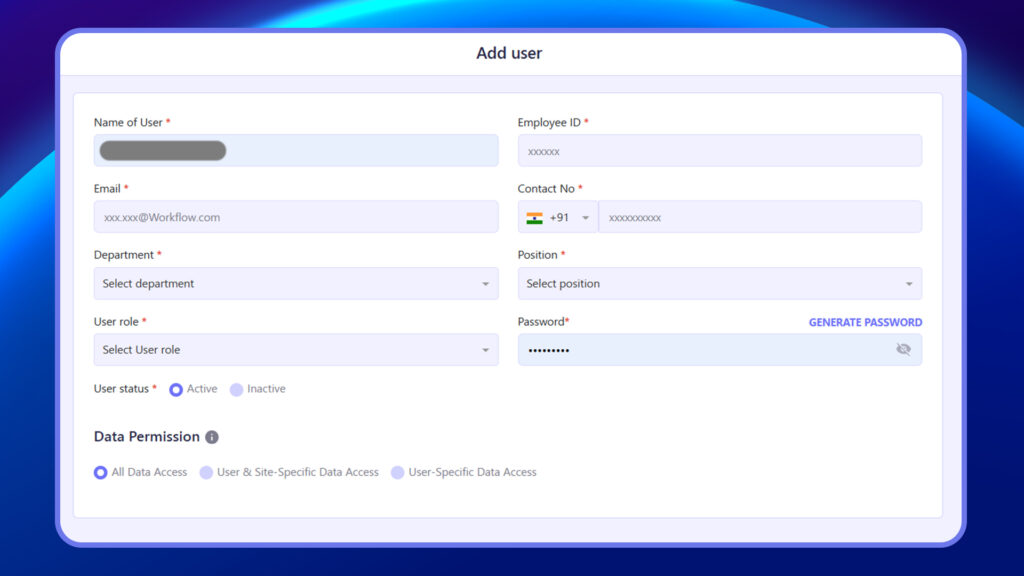
Step 4: Save User #
Click Save.


