Overview #
Categories and sub-categories help streamline information management by allowing grouping similar items together based on shared characteristics or their relevance within the organizational structure.
This organizational tool enhances clarity and accessibility, facilitating efficient navigation and retrieval of SOPs and checklists as per the user’s organizational needs and preferences.
How to Create a New Category #
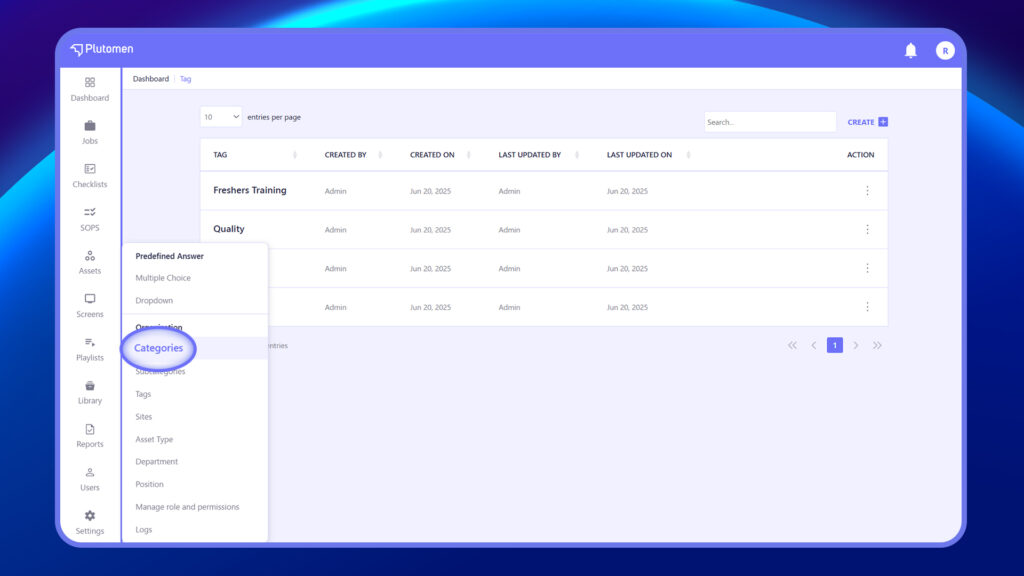
Step 1: Access Categories
Go to Settings → Categories.
Step 2: Create Category
Click Create
Step 3: Enter Category Details
Provide:
- Category Name
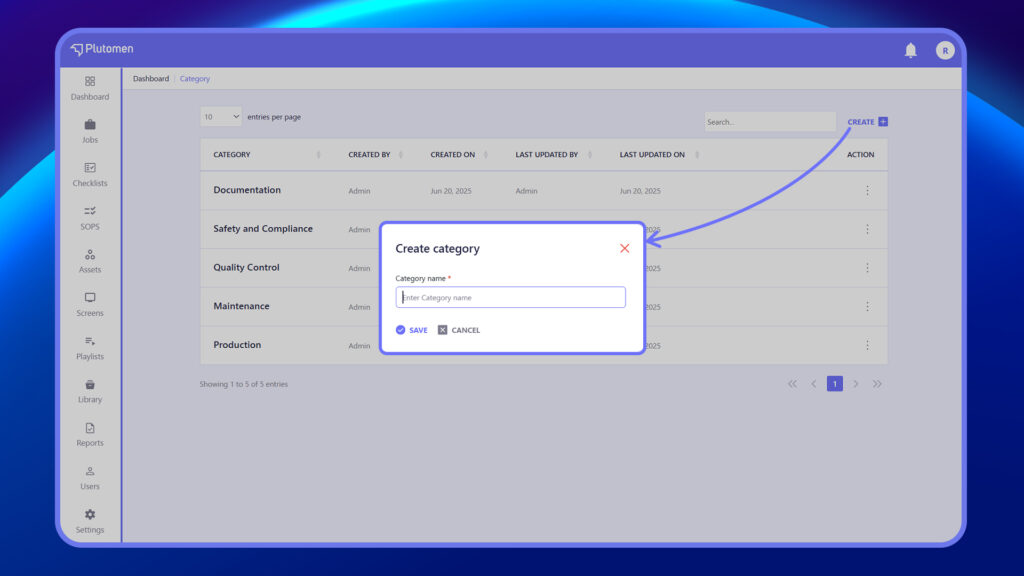
Step 4: Save Category
Click Save.
👉 Use clear and standardized names to maintain consistency.
How to Create a Subcategory #
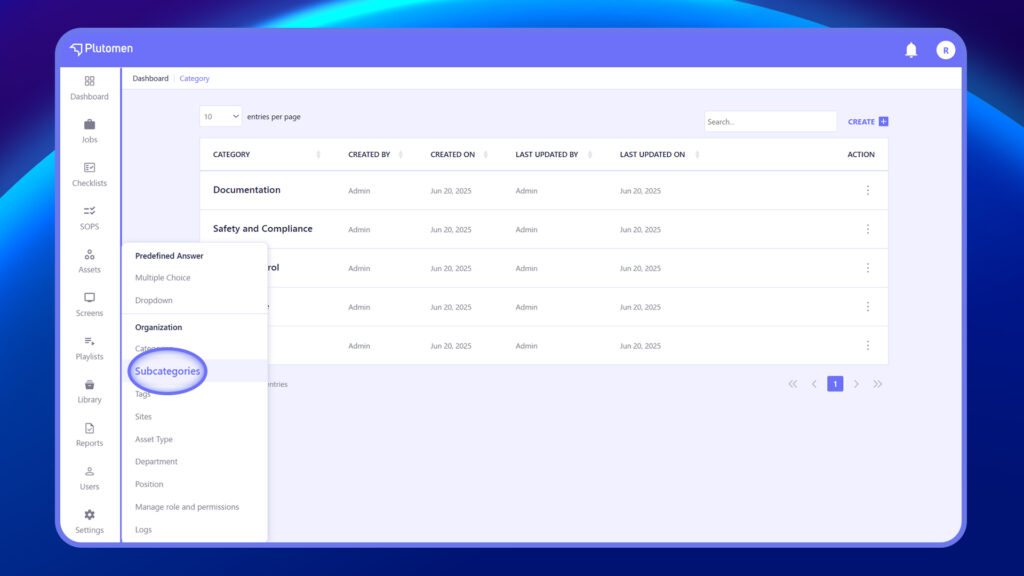
Step 1: Access Subcategories #
Go to Settings → Subcategories.
Step 2: Create Subcategory #
Click Create.
Step 3: Enter Subcategory Details #
Provide:
- Subcategory Name
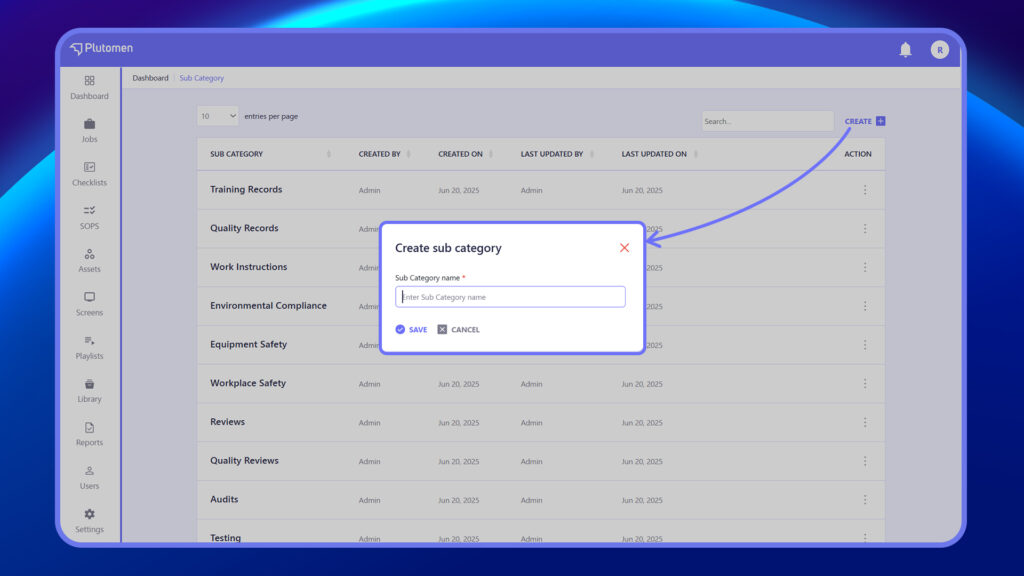
Step 4: Save Subcategory #
Click Save.
How to Edit Existing Categories or Subcategories and Update Their Details
Step 1: Open Section #
Go to Categories or Subcategories.
Step 2: Select Record #
Choose the item you want to update.
Step 3: Click Edit #
Click Edit or use the three dots (⋮) menu.
Step 4: Update Details #
Modify:
- Name
Step 5: Save Changes #
Click Save.
How to Delete Categories or Subcategories
Step 1: Open Section
Go to Categories or Subcategories.
Step 2: Select Record
Choose the item you want to delete.
Step 3: Delete #
Use the three dots (⋮) menu and select delete.
Step 4: Confirm Action #
Confirm the deletion.
👉 Deleting categories or subcategories may affect related records.
How to Use Categories and Subcategories While Creating Jobs, Checklists, or SOPs #
Step 1: Open Module
Go to Jobs, Checklists, or SOPs.
Step 2: Locate Category Field
Find Category and Subcategory fields.
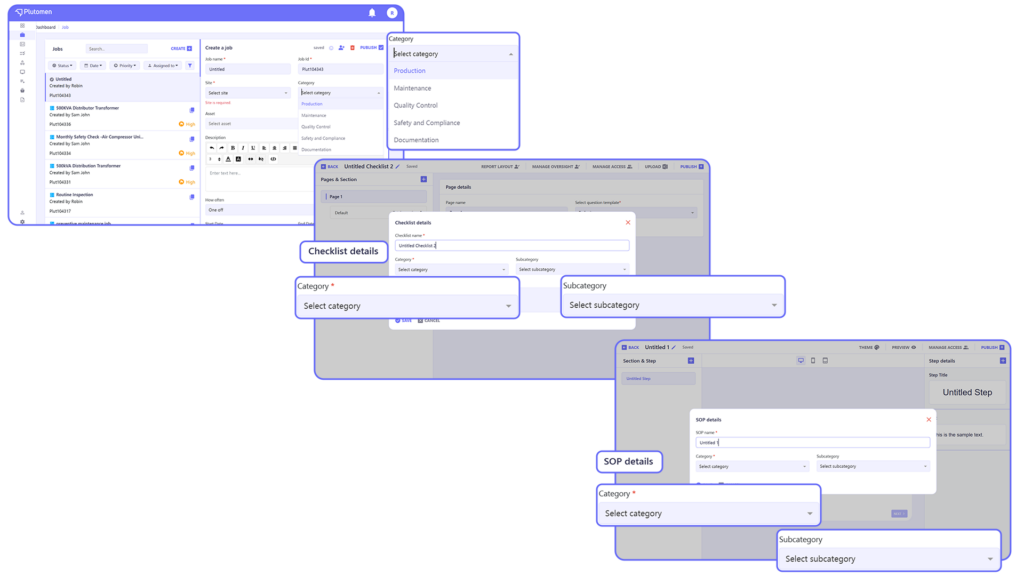
Step 3: Select Category
Choose the appropriate category.
Step 4: Select Subcategory
Choose the relevant subcategory.
Step 5: Save
Click Save.
👉 This ensures proper classification and easier tracking.


