Overview #
The Jobs module allows you to create, assign, track, and manage tasks across your organization. It helps ensure that work is properly allocated, monitored, and completed on time.
Jobs can be assigned to individual users or user groups, along with details such as priority, category, site, and deadlines.
How to Create a New Job #
Step 1: Open Jobs Module
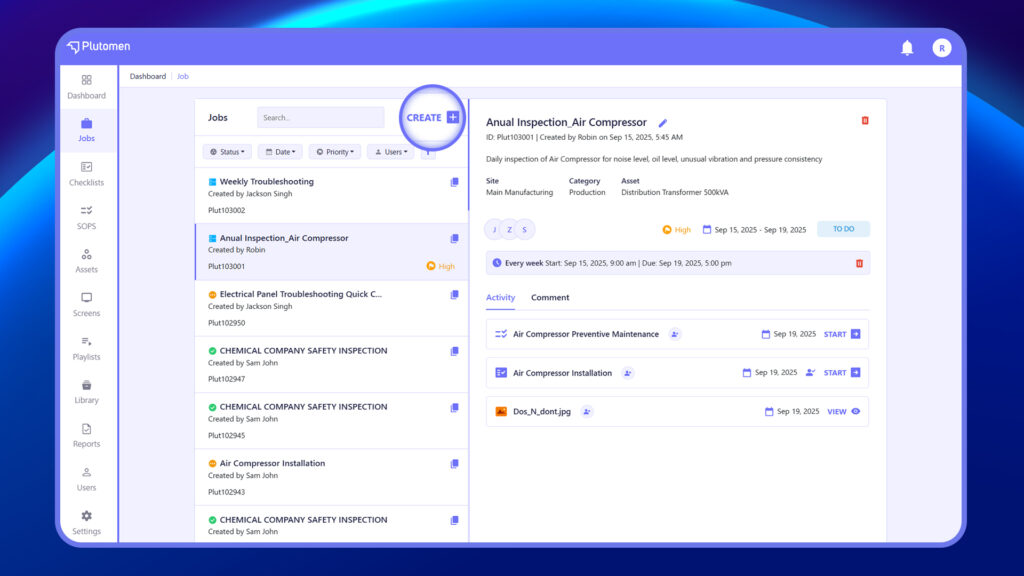
Go to Jobs.
Step 2: Create Job
Click Create Job.
Step 3: Enter Job Details
Provide the required information:
- Job Name – Enter a name for the job.
- Job ID – Provide a unique identifier (optional or system-generated).
- Site – Select the site where the job will be performed (mandatory).
- Category – Choose the relevant job category.
- Asset – Link the job to a specific asset, if applicable.
- Description – Provide details about the job.
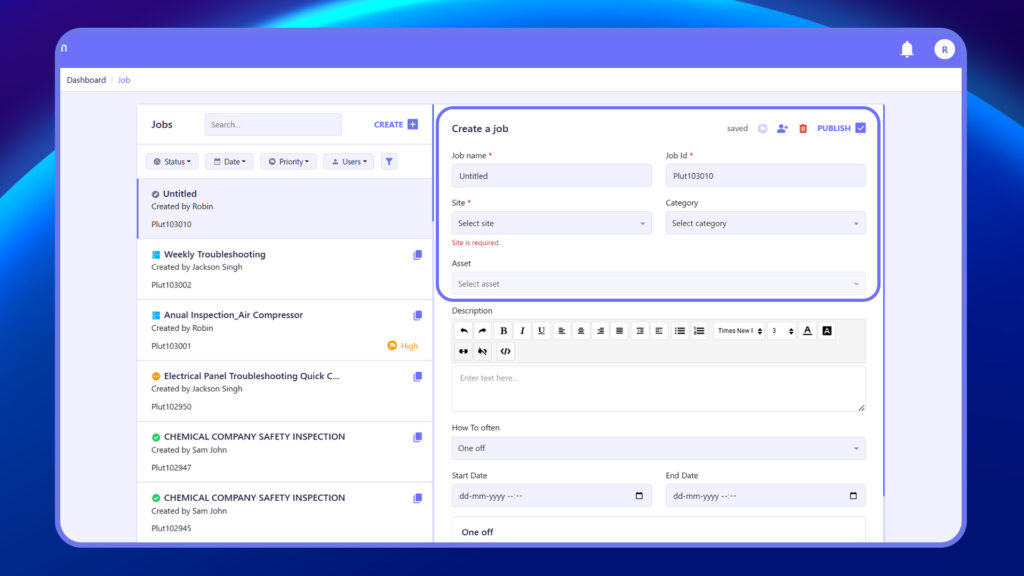
Set the scheduling details:
- Frequency – Choose how often the job should occur
Everyday
Every week
Every month
Every quarter
One-Off - If One off is selected, a note will appear indicating that the job will not repeat.

- Start Date – Select the date the job should begin.
- End Date – Choose the end date, if applicable.
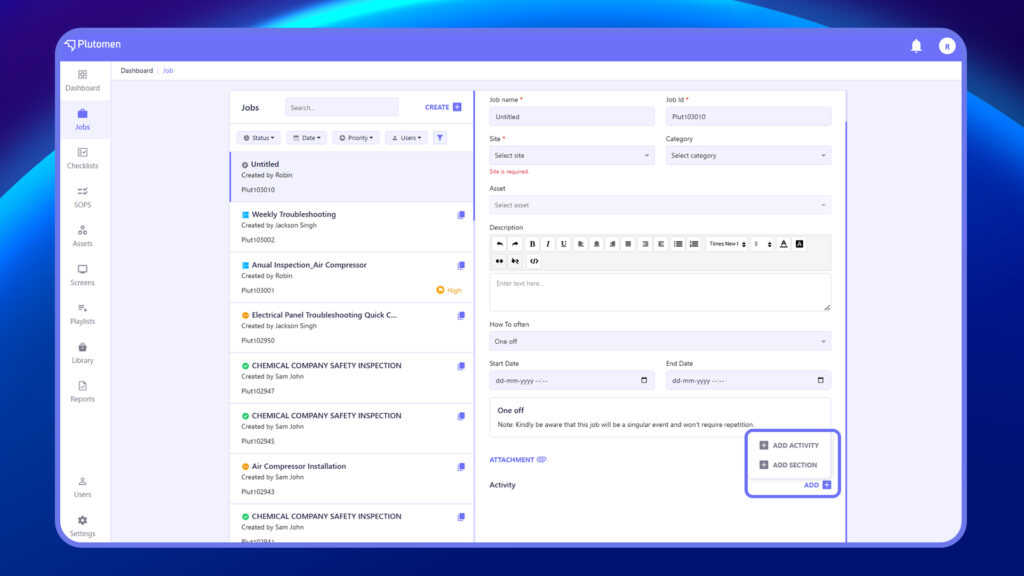
Step 4: Add an Attachment
Add an Attachment if you want to include any supporting documents.
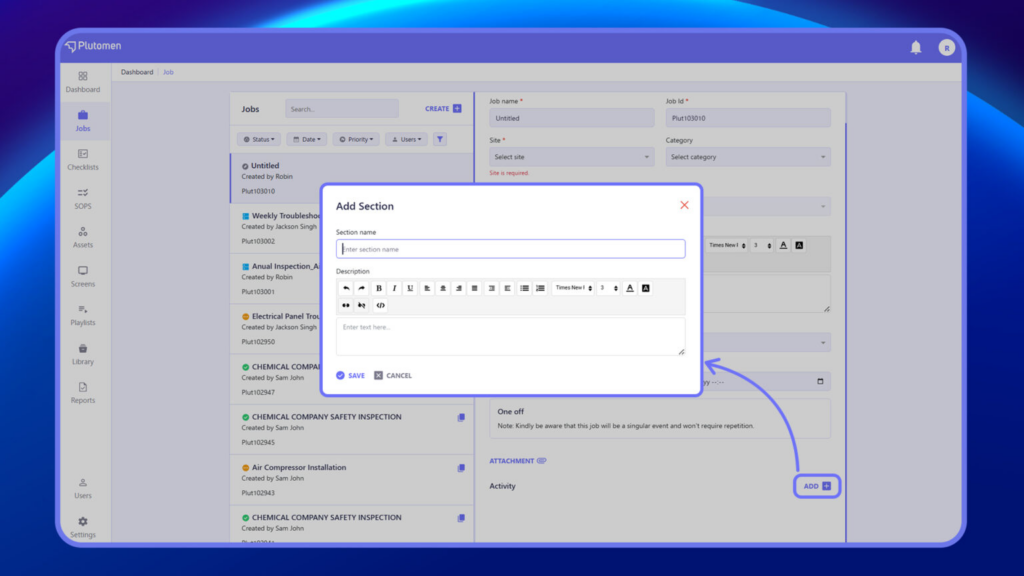
Step 5: Click on the “Add” button to include Activities within the job.
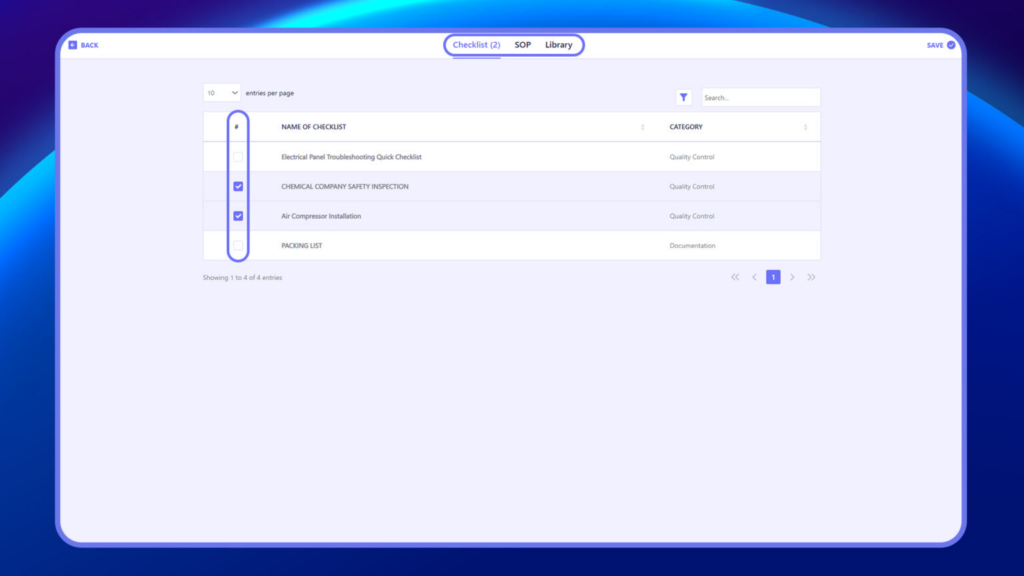
Step 6: On the Activity page, navigate between All published checklists, SOPs, and the Library tabs to select the desired activities and save them to the job.
Step 7: Optionally, add Sections to the activities to mark milestones or stages. All relevant activities within a stage can be listed together to track progress.
Step 8: On the Activity page, navigate between All published checklists, SOPs, and the Library tabs to select the desired activities and save them to the job.
Step 9: On the Activity page, navigate between All published checklists, SOPs, and the Library tabs to select the desired activities and save them to the job.
Step 10: Optionally, add Sections to the activities to mark milestones or stages. All relevant activities within a stage can be listed together to track progress.
Step 11: Arrange the sequence of activities by dragging and dropping them as needed.
Step 12: If an activity needs to be undertaken on a specific date, schedule it accordingly.
Step 13: Assign individual activities to users or groups as necessary.
Step 14: Alternatively, assign the entire job to individuals or groups for bulk assignment of all activities.
Step 15: Click publish to save and schedule the job.
👉 Adding complete details ensures better tracking and execution.
Job Reports #
There are two types of reports within Jobs: Activity Reports and Job Reports.
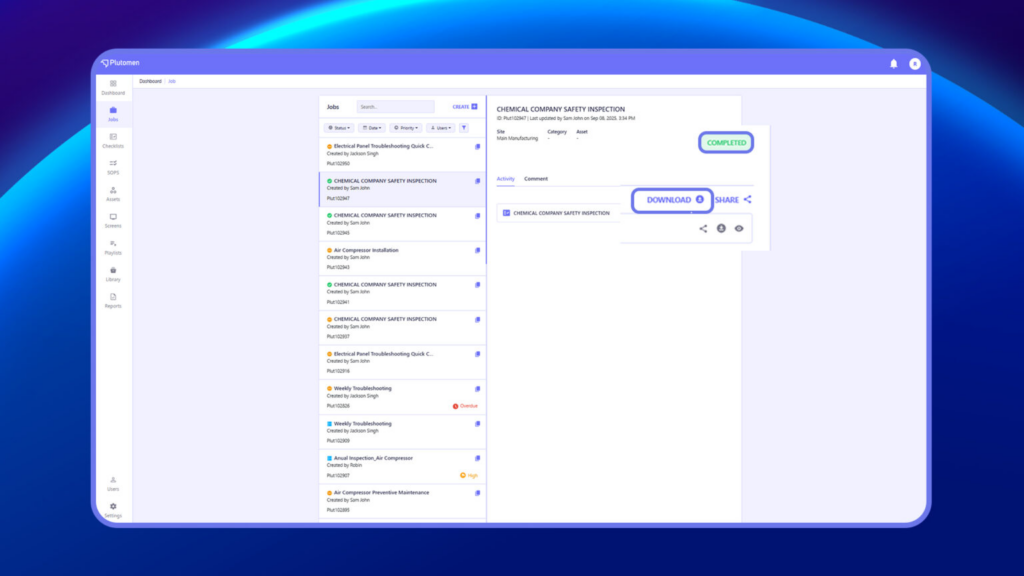
Activity Reports are generated for specific activities within the Job, such as SOPs or Checklists. These reports are generated immediately upon completion of the respective activity. Within a job, once an activity is completed, users have the option to share, download, or view the report.
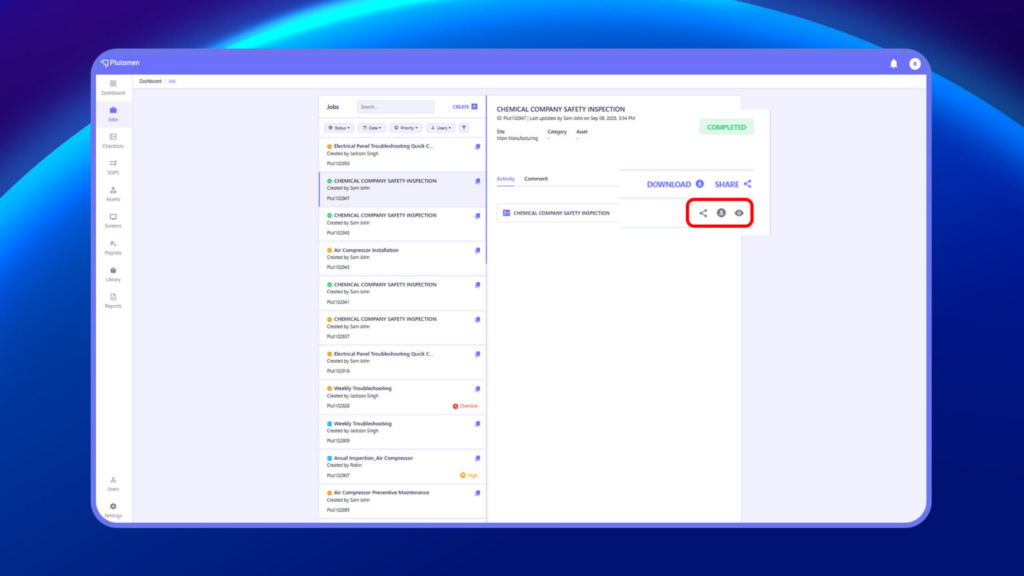
Job Reports are generated upon completion of the entire job and serve as consolidated reports encompassing all activities performed within that job.
Notes:
- SOP Module reports are exclusively generated when SOP view is completed within a job.
- SOP reports are accessible solely within the job module.
- Checklist reports are visible within both the job module and the report listing page.
- When a report is generated via a job, the job number is displayed for user reference and clarity
How to Assign a Job to a User or User Group for Task Execution #
Step 1: Open Job #
Go to Jobs and select the job.
Step 2: Click on Manage Access #
Click on the Manage Access (👥) icon available on the job.
👉 This option is used to assign users or groups to the job.
Step 3: Select Assignee #
Choose:
- User
OR - User Group
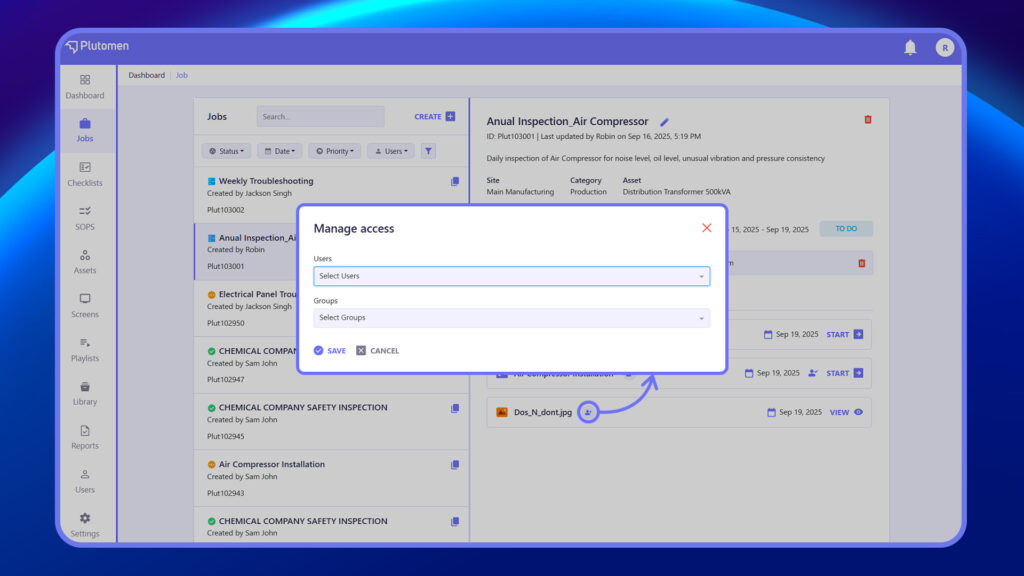
Step 4: Save Assignment #
Click Save.
👉 Assigning access ensures the selected users can view and work on the job.
How to Add Instructions, Attachments, or Checklists to a Job #
Step 1: Open Job #
Go to Jobs and select the job.
Step 2: Add Details #
Include:
- Instructions
- Notes
- Attachments (images, documents)
- Checklists (if available)
Step 3: Save Changes #
Click Save.
👉 Adding detailed instructions improves execution accuracy.


