- Log in to the web app.
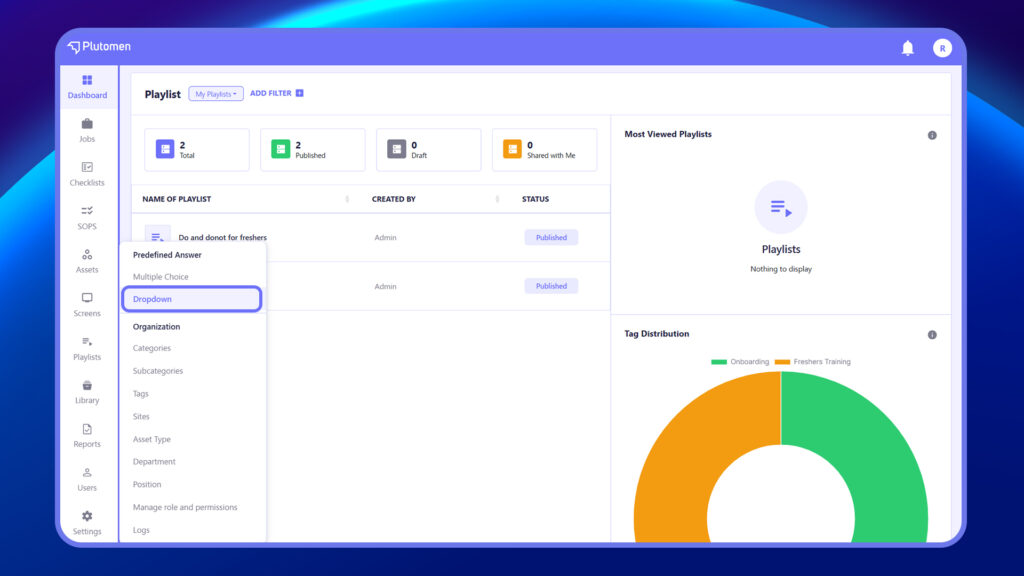
- Access ‘Settings’ from the left-hand menu.
- Within the settings, select ‘Dropdown‘
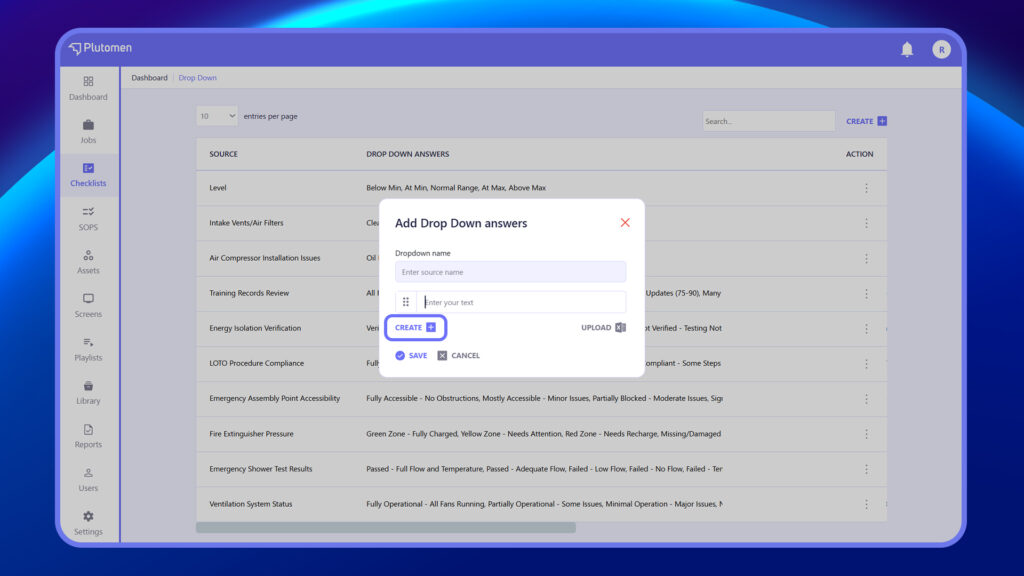
4. Click on ‘+ Create‘ at the top right.
5. Enter Source Name. Source Name is the Dropdown list name that will reflect when creating the checklist.
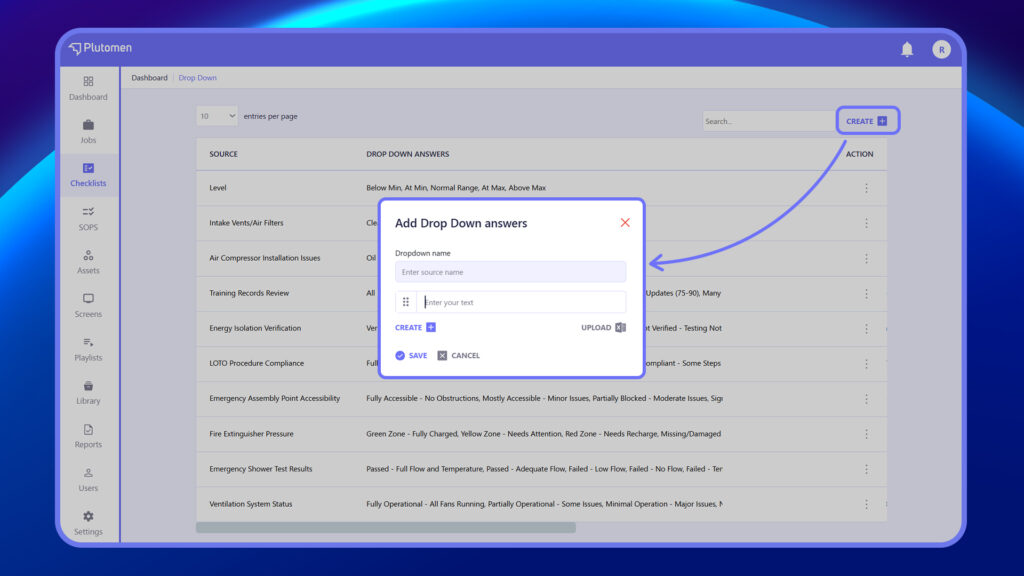
6. Start typing Drop-Down options in the ‘Enter choice’ field.
7. Click ‘+ Create’ at the bottom left to include further choices.
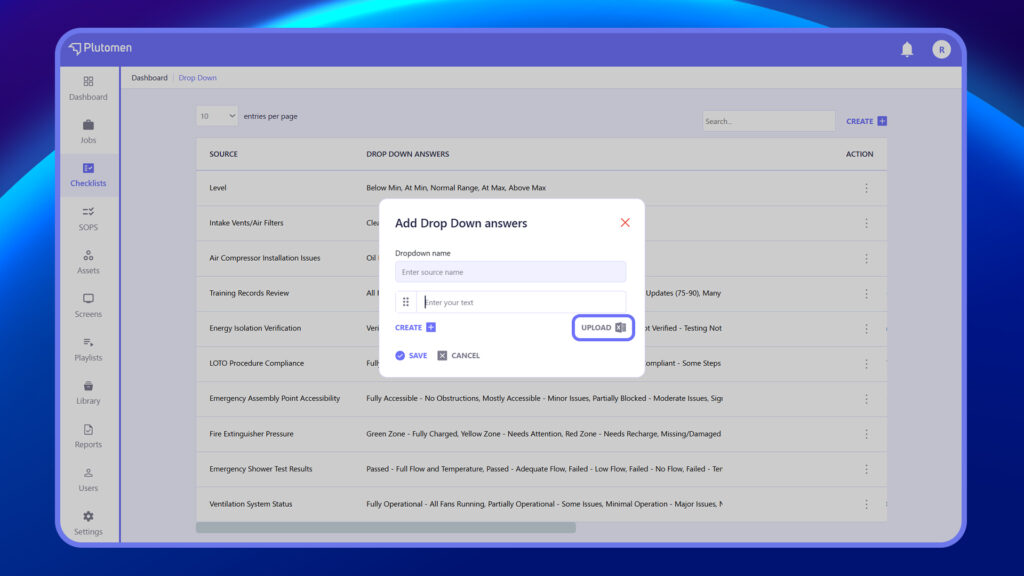
8. You can also upload Drop-Down options via Excel while adding long drop-down lists.
9. Once all choices are added, click ‘Save.’
10. The added Drop-Down choices will be saved on the Drop-Down option listing page and can be used for any checklist.


